Showing posts with label the. Show all posts

Guide to Get Beginner the best of the best of country wood projects

This Beginner the best of the best of country wood projects

Detailed information about Beginner the best of the best of country wood projects and your search ends here In the survey I get that not a few people who need a pdf version for Beginner the best of the best of country wood projects a bit review
Pic Example Beginner the best of the best of country wood projects

Great Wall China

Great Wall China

management awards 2013 10 2013 feedback @ mishcon com mishcon de reya

Management awards 2013 10 2013 feedback @ mishcon com mishcon de reya

Kitchen Design

Kitchen Design

Case Western Reserve University

Case Western Reserve University

Metal Lathe Project Ideas

Metal Lathe Project Ideas

spot Beginner the best of the best of country wood projects whose many soul solicit guy take place roaring as for since find Beginner the best of the best of country wood projects

And sure i hope this Beginner the best of the best of country wood projects post Make you know more even if you are a beginner though

Share:

Beginner wood art projects around the house

Beginner wood art projects around the house

Ed wood - wikipedia, the free encyclopedia, This article is about the film director. for the film about his life, see ed wood (film).. Ashley wood - blogspot.com, Wwr the chase giclee 32.5" x 17" high quality print ( printed by ashley wood ) shipping worldwide is included in the price 75 editions available from my store very soon. Project unbreakable - tumblr, Project unbreakable is a photography project aiming to give a voice to survivors of sexual assault, domestic violence, and child abuse. project unbreakable has been. List of unusual words beginning with p - the phrontistery, Brief definitions of obscure words starting with the letter p. Five simple machine sewing projects for beginners, By julie, towards sustainability have you begged, borrowed or been gifted a sewing machine that's gathering dust in the corner because you don't really. Little people - a tiny street art project, A tiny street art project from london, uk..

Remarks by the president on a new beginning - the white house, I've come here to cairo to seek a new beginning between the united states and muslims around the world, one based on mutual interest and mutual respect, and one based. Woodworking plans & tools | fine woodworking project, Who is woodcraft? since 1928, woodworkers have trusted woodcraft to deliver quality woodworking tools, supplies and service. with more than 20,000 tools and supplies. Woodworking - wikipedia, the free encyclopedia, Woodworking is the activity or skill of making items from wood, and includes wood carving, joinery, and carpentry..

Posted by Vaughan Ling at 2:59 PM 1 comment:

Posted by Vaughan Ling at 2:59 PM 1 comment:

LA + Pomona Swap Meet

LA + Pomona Swap Meet

Except for these

Except for these

Sachin Mistry said

Sachin Mistry said

List of unusual words beginning with p - the phrontistery, Brief definitions of obscure words starting with the letter p. Five simple machine sewing projects for beginners, By julie, towards sustainability have you begged, borrowed or been gifted a sewing machine that's gathering dust in the corner because you don't really. Little people - a tiny street art project, A tiny street art project from london, uk..

Ed wood - wikipedia, the free encyclopedia, This article is about the film director. for the film about his life, see ed wood (film).. Ashley wood - blogspot.com, Wwr the chase giclee 32.5" x 17" high quality print ( printed by ashley wood ) shipping worldwide is included in the price 75 editions available from my store very soon. Project unbreakable - tumblr, Project unbreakable is a photography project aiming to give a voice to survivors of sexual assault, domestic violence, and child abuse. project unbreakable has been. List of unusual words beginning with p - the phrontistery, Brief definitions of obscure words starting with the letter p. Five simple machine sewing projects for beginners, By julie, towards sustainability have you begged, borrowed or been gifted a sewing machine that's gathering dust in the corner because you don't really. Little people - a tiny street art project, A tiny street art project from london, uk..

Share:

The TV console out of red cedar and construction brackets Comment

Hi Everyone,

For those of you who have been following the TV console project, Ive deleted my previous two postings about it and Ill explain why: it turned out that I made a lot of mistakes with it and had to completely re-do the whole thing. Here is a photo of the first effort several days ago:


It looked terrible. The parts didnt fit, the top didnt lay flat on the frame, I screwed up the bottom shelf and tried to improvise a solution. It didnt work.

So the next day I took it apart and completely disassembled it. I cut the legs down by 5 inches and very carefully with assorted wood working clamps and a square, completely re-assembled it. I also replaced the improvised shelf and went and purchased more lumber for the top and re-did that from the original plan I was going to start out with.

Here it is now:


Discussion and Further Plans

I still think the concept of construction brackets for use in household furniture is a good one and Im going to attempt another console next week. Here are some caveats however before I do this again:

Wood-the cedar looks really nice but its just too soft for furniture use. It dents and tears easily and if this were a regular table, it would not hold up to daily wear and tear. So next time Ill use pine or poplar. Also, no more construction grade lumber. Its not seasoned so when you get it home, within a day or two it will begin to twist and crack. Its also too rough. Next time Ill use a higher quality wood.

Brackets: the brackets work well. I primed and painted these and they dont look half bad. It does give the piece a more finished look. But next time Ill use smaller brackets so theyre not so prominent in the design.

Assembly-the devil is always in the details and very much so with the assembly.  The brackets have to fit the lumber very snugly in order for this entire system to work properly and all the part to fit together correctly. Its imperative that you proceed slowly and carefully and clamp the brackets to the 2x4s before you screw them together. Also check the squareness with a carpenters square as you proceed. This will give you a much nicer appearing piece at the end and the parts will fit together better.

Design-You cant make a silk purse out of a sows ear-remember, this is fundamentally a dressed up construction piece. You can make it look nicer by taking your time and carefully considering just how this will fit inside your home and what it will look like along with all your other furniture. Its never going to be fine furniture no matter what you do. My furniture is a little more rustic in appearance so this will fit in but its going to reside in my bedroom with a tv, a dvd player, lots of other stuff, and a cat or two on it and for this its adequate. 

I am going to make another console as I really need some furniture at the moment and Ill carefully post about that. That will probably happen next week so stay tuned.

Now, I need to turn my attention to the fall art show so thats what well look at next.

More later,
VW


Share:

Still more about the box elder

Hi Everyone,

Ive roughed out the two long pieces of the box elder wood:


Isnt that red grain amazing?

VW
Share:

Escape to the Bat Cave Boy Wonder!!

Things go up and things go down. That is the circle of life but the truth is you dont necessarily have to feel happy about it when you hit the downs. Sometimes those circles move in different directions at the same time.My trusty PC, the one that has been through hell and back with me, finally coughed and sputtered and kicked out some bad news, It was caught in a loop with a windows update and there was no working my way through any backdoors to clear it. My option was not a favored one, reboot the PC to the beginning and start from scratch. Thank God I back up at the start of each month, but it being late in June, I will lose a months worth of work on it, not to mention Im now stuck reinstalling the antivirus and msoffice and firefox and a dozen other programs. Very frustrating and time consuming. Part of me is thinking about saying piss on it and going to get a new laptop. If I have to start from scratch anyhow . . . if I had the money I would have decided already. But never fear, while I get things reset on my PC I do still have the wonderful access to my wifes laptop, and that will keep this blog rolling.

So what does one do with all kinds of pent up tech frustration? You retreat to your inner sanctum, your hide-out, your fortress of solitude, the place you can put it all behind you. You pull the head on the little statue that opens up that sliding bookshelf in your study and you go riding down the firemans pole to the bat-cave. "To the Woodshop Robin!!"  Actually with all the hand tool work Ive been doing lately I feel much more like Im escaping back to the 18th century. (Well the fact that Im in the middle of reading "The Jointer and Cabinet Maker" might have a significant influence on that feeling as well)

I am so close on the joinery bench I can taste it. I finally got back down to the shop to make a dent on Friday, I had some repair and clean up work to do on it. One of the cleats that holds the legs in place went Epic Fail on me as the glue in the dado failed, upon inspection I found that I didnt get that good of coverage to start with, so I did a light re-plane on both surfaces and reglued the effort. Once I have the hickory I am wrapping the top with on it will add some support to the cleats I wont have to worry as much. I also had to complete the assembly and glue up on the other leg frame (to see the drawboring technique used check my previous post HERE)

Once the frames were complete I worked on the bottom brace that would keep them in square to the bench top. What I may have to remind readers of at this point is that this bench is being designed to knock down for smaller transport so I can take on the road to do hand tool woodworking demonstrations at Medieval and Renaissance Faires. I plan to just set up and build a six board chest from scratch, so that may explain some design choices when it comes to this.

I ganged the legs together and cut out a notch to drop in the bottom rung.


I then selected a straight section of 2x4 and planed it to square. I used the cleats as a guide to set the location of the notches. The notches in the legs I made 3/4" deep and in the cross bar theyre 1" deep. I will clean up the ends of the cross bar before the project is over, maybe a nice round over or an ogee profile, but for now Im all about utility.

I then set legs in place and drilled a single hole through both cleats and the leg to accept a carriage bolt with a wingnut. I think the weight of the benchtop will hold things together nicely but the one bolt on each leg will make sure the construct stays together when its being moved or set up.

Well at this point you just cant help but set the whole thing up and see here youre at. So I assembled the baby and flipped her over, As you can see from the picture, I desperately need a bigger shop. :)


I am concerned with how top heavy the bench will be, I am thinking I will make some heavy stakes out of re-bar to literally stake the bench to the ground where I work, Im hoping this will solve that worry. but I wont know for sure until I get to use it in full force.


From here I start to wrap the top in a beautiful hickory board that I bought just for this project, but to see that you will have to tune in to the next episode faithful viewers, (to stick with a cheesy theme here) Same Bat Time - Same Bat Channel. 

Cheers

Oldwolf
Share:

The Perfect Office Chair

An office chair will come in all sizes, colors, and shapes. Ergonomics means that a chair has a healthy design. Chairs may come with adjustable parts. All the while, the human body comes in many different shapes and sizes.

Some may be tall, other short. Some require a large chair, while others prefer a smaller width. As much as we may want it to, the human body isnt as flexible as an ergonomic chair. Even though it isnt possible to find the perfect office chair for everyone, its quite possible to get adjusted to all types of seating.

Even if you arent able to find the perfect office chair, you can alchoices use techniques to make the most of the situation. They can help make proper use of the body and even enhance your coordination as well. The idea here, is to hold your neck in such a choice that the length of your spine and neck arent shortened or curved in any choice.

There is no ergonomically designed office chair that can force your body into the correct position it should be in. Its up to your body and mind to sit in a a healthy manner.

When it comes right down to it, finding the perfect office chair is all a matter of whats best for you. Office chairs come in all different shapes and sizes, such as human bodys. If you try out several chairs, youll find the perfect chair for your particular body size.

Once youve found your perfect office chair, you can relax like never before. At the office, finding the perfect chair for yourself is something you must do. Finding your perfect office chair isnt that hard - all you have to do is look around.
Share:

Its Wanderful Part 2 The Begining


Having reviewed the wands with three (3) fellow woodworkers, and having been given solid advice by all three (3) of them, I was still not completely sure how I was going to make the wands. Yet, since I had been  procrastinating like a pro, I decided the time had come buy the lumber and start the making if I was to have any chance of finishing them by the movie premiere.

As I’m not familiar with any good local hardwood dealers and the project itself was enough stress, I went to my go-to source for nice wood, Bell Forrest Products. Though I had received advice on good carving woods, I completely ignored everything I’d been told and ordered me up five (5) 1.5”x1.5”x18” turning blanks of hard maple. I know . . . this didn’t make for easy shaping.

Heres a somewhat random picture of the walnut book stand I made for the
2010 Sawdust Chronicles Fall Build Challenge. It doesnt have anything
to do with the wands, but I like it and I dont have any photos relevant
to this stage in the wand saga.
About the same time as I ordered the wood for the wands, I also was lucky enough to have my Slide Out Storage Cabinet featured in the Tools of the Trade section of Popular Woodworking Magazine. The Lee Valley gift certificate I received as a result was put to good use. I ordered a spokeshave, rasp and cabinet scraper.

Finally, having received all the advice I could manage and with tools and wood in hand, it was time to start making some wands.

The first thing I did was take one of the blanks, and turn it into an octagon by cutting off the corners on the table saw. I then went crazy with my new spokeshave and turned it into a dowel, about ¾” in diameter. Though useless as a wand, this first test piece was set aside for carving practice and dye and finish experimentation.


How did you finally start that project youve been procrastinating about?

Its Wanderful Part 1
Share:

I Left The Oven On Or Did I

The other day, while mid-conversation with my wife, I had a sudden, terrible thought. No, I knew the oven was off. My fear was much worse; Had I glued MDF panels into the frames Id fabricated to fit OSB?

If youve been reading along on the beginnings of my bench construction, youll know that I fabricated the rabbets in my bench panel frames of different depths to accommodate their respective panels (MDF & OSB). Though both sheet goods are 3/4" nominal thickness, they are just a hair different in actual thickness. Using scrap boards and relative dimensioning I made sure that each rabbet was exactly the right depth. I went as far as to mark each frame with their respective panel type with purple chalk.

The stove was off and the OSB was
in the OSB frames.
After many hours of worrying, I took a quick dive into the garage as soon as I got home. Luckily, the MDF panels I glued were set in their corresponding frames.

After that scary episode, I got to work and assembled the OSB panels in the OSB frames as intended. There concludes my bench construction for now.

"Why?" you may ask am I taking a break from the bench? Because its January! Time to build the Guild Winter Wall Cabinet.

The first draft of the bastard
wall cabinet.
As Ive said, I plan to bastardize the guild design and transform it into a tool cabinet. The image to the right is my first draft at the cross section of my design. I would go into detail about all the stubby little shelves and rear plenum, but suffice to say I drew it late Sunday night and after a good nights rest Im not particularly happy with it. Im working towards having the revised design ready for the pre-build chat on Wednesday at 10:00 pm Eastern. If I have time Ill throw the design up here first. Even if I cant, Ill see you at the chat. Don’t be late.

Have you ever rushed home to find the oven off?
Share:

A Furniture Maker 6000 Years In The Making

Ejler Hjorth-Westh was my favorite presenter from Woodworking in America 2013. This month, hes profiled by Linda Hock in the Hock Tools Newsletter.

Ejler at WIA 2013

If youre not familiar with Ejler, hes a Danish furniture and boat building who has called Northern California his home since the early 1980s. Ejlers take on woodworking (and specifically chair design) mixes a grasp of the history, a love of the craft and an enjoyment that I found conveyed more joy and satisfaction and just about any instructor Ive had.


Be sure to check out Lindas extended interview with Ejler. You can read it in its entirety on the Hock Tools site here.

Ejler showing us how to cut his armrest to let joint at WIA 2013

Dont forget about the +Modern Woodworkers Association Podcast. We talk woodworking with Guests from around the world of woodworking every other week. Subscribe to the RSS feed or iTunes today.
Share:

Finishing the built in part 1

Now begins the time consuming task of finishing the built in.  The first step is to fill all cracks and voids, generally with a wood filler or a lightweight spackling compound.  Then, the entire unit gets sanded. In the following pictures, the unit has a coat of Zinsser primer on it.  Due to work load, Ive hired this process out to a good friend and a fine finisher, Bob Plunkett. The most time consuming areas are the small cubbies up on top. After the primer is dry, Bob will resand the unit as needed before painting. These pictures will give an idea of how Bob is making the unit take on its final appearance...


Share:

Finished the Woodshed

I was thinking today that Im a pretty busy guy ... I play golf and tennis pretty regularly, I draw for pleasure, I read (and write) a lot, and now that Ive finished my woodshed, Im about to start paddle tennis season and go back to making some pottery ... sheesh. I love it though. One of my longtimest hobbies is spare time functional carpentry. I was a carpenter for seven years before I started making furniture full time in 1980. Its waaaay more relaxing than furnituremaking (1/8" ? close enough ... nail it ... ), and I just like the process of dreaming something up in its space in the landscape, drawing it, and always having it to tinker with when I get the urge. I plan to write more on this later ...
Ive been working on the woodshed below since early April and it started out in my head as something totally simple, a one pitch place to put my firewood for the wood stove we installed last year , like the one below I built in 1975 ... Then, Kit pointed out that it would be the first thing you saw when you drove up ... and then, the design just took off on its own ... Click the pictures to enlarge them ...

Original in 1975 ... Pine handhewn beams (by my brother-in-law and I, broadax and all) Notice the fine mustache and trim figure

Revised sketch in the Greek revival mode to (sort of) match the house and garage .. Gable end ornaments next year...

A little inspiration from Architectural Digest ... I think Ill pass on the reflecting pool

Early April start, this spring .. Previous posts here and here

As it was this morning .... cleaned up the leftovers last thing yesterday ...

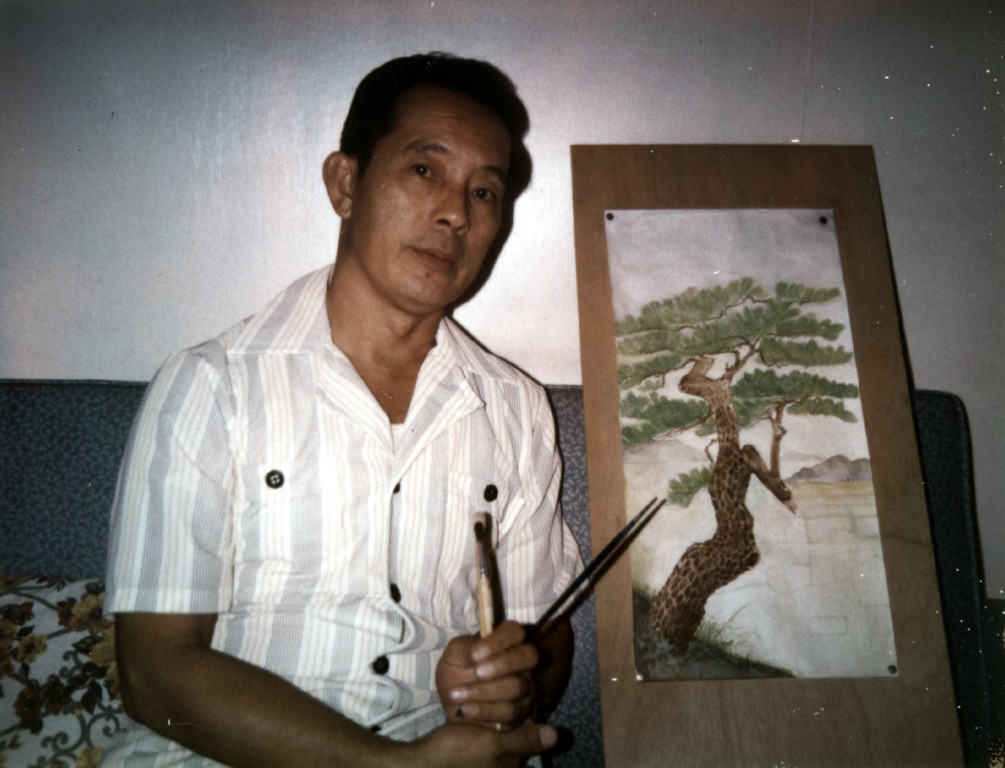
I had this piece of stained glass from my old shop. It was made in 1981 by a friend of ours, Stephen Gormley who has gone on the become an internationally famous glass artist ... Correction. ... a really big deal internationally famous glass artist Check out some of the projects on his website ...


Steve and Dan  1981, actually ... 

Anyway, we took teh window when we sold the Arlington property and Ive been looking for a place to use it since we left there in 1997 ... Looks good here ..


Back side ... I put a tarp over the back for the winter .. Ill take it down for the air to flow through again next spring
I might if Sam were to get inspired to contribute some serious help, have a new metal shop in me for next summer ... Well see ... It doesnt cost much to imagine what it might be like and I have all winter to sketch ... ..
Here are a couple other small, spare time buildings

Kits garden shed ... this one went on with the back wall unfinished for about 5 years, or maybe even more

Front side from the front porch

The garage and metal shop. Actually, I had a contractor frame and roof the main, two car part, but did the siding and metal shop on the far end as a spare time thing ... That one lasted, I think 3, maybe four years

Back side with the metal shop on the far right and the wood shed just peaking out in front of the house

The sawdust shed ... All for now ... I have to find my treehouse pictures from Arlington....
Share:

Petersburg Mi framing for the bookcase

Here are some new pics of the cherry project. Ive been framing in the new wall, which the cherry will be mounted to. Well be working on the electrical rough in for outlets and sconces soon...


Share:

Shooting Down the Planes

A Natural Progression

Sometimes Ill meet fellow woodworkers who dont yet utilise a shooting board in their workshop arsenal. In my mind I think that they dont fully understand how much this simple appliance can help hand tool users accurately perform tasks in woodworking. This article is not about the shooting board as much as its about my personal journey through the stages of shooting board hand planes. Lets begin...

A few years back I made myself my first shooting board, at the time I had a nice old Stanley #5 Jack plane; its 14" long and at just under 5 lbs it made for a great shooting plane. It had been given to me by my father who acquired it from my grand uncle, John Pier; he probably bought it new some fifty-plus years earlier. When I got it it had the usual signs of good use, some light surface rust, a small crack in the tote and some dirt and grease. I took the plane, cleaned and oiled it, flattened the sole and replaced the iron and chip breaker with Ron Hock replacements. I also replaced the original knob and tote with some aftermarket Rosewood replacements. This thing shined like a new dime and worked like a dream. One cold, early morning in February I was about to begin trimming a few shavings off of some nice birds eye maple when it fell to the cold, hard cement floor of my then un-heated shop. As my stomach turned, I was afraid to look down...cracked. Completely in half at the throat...the old cast body was no match for the cement of my garage-turned-wood shop and I felt like I was going to need a psychiatric evaluation. Well, to make a long story longer I decided to try my hand at plane making. I had recently read The Fine Art of Cabinetmaking by James Krenov and was looking for an excuse to make a, what has now become known as the Krenov style plane.

I modeled the overall dimensions of the wooden bodied, dedicated shooter after my old Stanley (RIP). The new plane turned out to be in the 14" length by 2 1/4" wide. I used a nice piece of quarter sawn white Oak harvested and milled close to my home back in Cape Breton and to add even more protection/armour I laminated a piece of Jatoba to the sole creating a versatile shooting/Jack plane. I also used the Jatoba for the wedge and cross pin. Again, using a custom Ron Hock chip breaker and iron, I was quite pleased with the results. Well at least for a few days...it turned out that even in my attempt to make the plane sides accurately square to the sole I missed my mark a little. The plane functioned perfectly as a kind of Jack/Smoother, but as a shooting plane it just wasnt up to snuff. So on to brighter days. The spring time came after that long, lonely winter and I decided it was time to replace the old #5. I did some research and discovered a modern replacement that not only would be an ideal shooting plane, it by far exceeded my good ol buddy Jack.

The Lie-Nielsen # 5 1/2.
Amazing, simply amazing. What more could be said, this thing arrived right out of the box ready to work. Its just over 14" long and weighs in at a whopping 7 lbs. As a dedicated Shooting plane Ive been quite happy using this tool day in and day out. Sometimes while smoothing larger panels like the top for a trestle table I built last year, I would re-adjust the mouth and actually use the 5 1/2 as an over sized Smoothing plane. Again the performance of this plane excelled and for jointing short boards, ideal. You wont ever regret owning this heirloom quality hand plane. And with that I say, "Why stop there?"

Bring out the IRON MITER...

That feeling of revelation or better said, awe inspired-mouth hanging open, dumb-foundedness I sensed all those years ago when I finally decided to build a shooting board came flooding back this past week when my Lie-Nielsen # 9 arrived from their head office in Warren, Maine. To finally know and truly feel what a dedicated Shooting plane is like was really something special. This thing smokes! Seriously, if you were ever half considering but couldnt justify purchasing a dedicated hand plane like I had been doing for the past couple of years and finally want to make the plunge, I say go for it. You will not be disappointed. While all of the other planes mentioned in this article performed from adequate to quite well, this is the real-deal. Effortless and consistent. The blade adjustement controls perform like a finely tuned race car and the body and workman ship-a true master piece. What more can be said...Ill still use the 5 1/2 as a (to quote David Charlesworth) Super Smoother and the Krenov style wooden plane still finds its way to the workbench on ocassion; but the Iron Miter, this #9 will be from this day forth my Shooting Plane.
My dedicated Shooter and cement floors be damned! Cheers.
Share:

The Ply Wooden Boat Part V Sailing The Sea

Now that the boat was built and waterproofed, the only things left to do before it’s maiden voyage were to take it to the lake, and determine how I would propel it. I, of course, decided to take it to the lake first, and fabricate its means of propulsion in the parking lot next to the beach.
Have boat, will travel.
While Eric used a single oar for his GardenFork.tv boat, I found that with the increased width of my boat it was too wide to use a single oar effectively. I made two (2) oars (like a traditional row boat) instead.
I built the oars in the parking lot at the beach.
I attached the U-shaped oar pivots on the dock.
The oars were cut to length on the dock too.


The finished oars.
Making the oars was as simple as cutting a rectangle of scrap ⅜” plywood, trimming the corners off and then screwing it to a 2”x2”. To act as oar pivots, I cut two U-shaped pieces of plywood and screwed them to the outside face of the batten with ran down the top of each side. The oars simply dropped in the opening, which was cut with enough room to allow the oars to move.
Finally, ready for the open sea.
Finally, the boat (dubbed the S.S. Sea Man) was ready to set sail.

My cousins, Doug and Robert, and I carried it passed the rocks (Lake George is beautiful, but lacks sandy beaches) and into the water. I gave it a brief moment to confirm it was watertight. Then I hopped in and I set off rowing.

Row like the wind.
The boat was in and out of the water for three (3) or four (4) days over the course of our vacation. It proved a stable craft. My kids (and cousin) enjoyed going out on the boat and it proved a stable platform for launching firecrackers. I was able to successfully carry two (2) adults and probably could have managed a third.
I did ultimately get the hand of steering it with the oars.
After the first day, I moved the cross batten further back to reduce the number of times I hit my knuckles on it while rowing. That made it better, but not great. In the end, what kept the boat’s use down were the unbearably uncomfortable square oar handles and the cramps I managed to get from the lack of a seat.
To move the batten back, I first added a new one, then removed the old one so the boat sides wouldnt spring  back together.

I managed to row a good ways into the lake. Had a had a destination, I may have gone further.


Come aboard, were expecting you.
From the boat, I was able to get the usual great views of the lake and shore.

A panoramic taken with my phone from the boat.
Though it was my intention to scrap the boat after the vacation was over, my Dad seemed to have taken a liking to it and offered to store it at his barn in Greenwich, NY until next summer. That, of course, has me thinking. I already know how I’ll be adding seats and a better pivot mechanism for the oars next year.
The boat survives, to be sailed again next summer.
While there are inherent risks in boating of any kind, and this isn’t a project you should take on without considering those risks, I’d highly encourage building a plywood boat of your own if you get a chance. The one featured on GardenFork.tv is very straightforward to build (just leave out the bottom window) or embellish it as I did. Either way, there’s nothing like the feeling of sailing the open seas heading to Mexico in boat you crafted with your own hands.
Share:

Popular Posts

Cari Blog Ini

Powered by Blogger.

Label

Recent Posts

Pages